Sunday, November 11, 2012

Election Night Roasted Eggplant Parmigiana

Or should I call this 'Good Luck Eggplant Parmigiana'? I won't gloat, but this dish definitely made an excellent night for me even better (#4moreyears).

Karl was out of town on election night, leaving me to sweat it out by myself. I knew that I needed something comforting but also easy because I planned on being glued to CNN all evening. I also wanted it to be healthier than the usual fried version of this dish.

The results were delicious, just like the election. Enjoy!

What you'll need*:
1 large eggplant
cooking spray
tomato sauce (a few cups)
pecorino romano cheese
fresh mozzarella (Don't bother using the shredded variety. This really makes the dish - I used 4 oz)
A few fresh basil leaves
**As I mentioned, I made this dish for just myself so this recipe doesn't make very much. I recommend doubling the recipe if you are making it for more than one person... because you will want leftovers.

How to do it:

Preheat the oven to 475 degrees. Thinly slice the eggplant. Many recipes recommend that you peel the eggplant and salt it for at least 30 minutes before breading and frying. Since I wanted something easier and healthier I skipped all of that. And, you know what? I may never do it the more complicated way again.

Spray your sheet pan with the cooking spray and coat both sides of the eggplant with cooking spray, salt & pepper. I used two pans for one large eggplant. You may need to roast in batches if you're doubling the recipe.


Roast the eggplant for about 20 minutes. You will need to watch it pretty carefully and turn the slices a few times to ensure even cooking. You want them to end up looking something like this:


Now it's time to assemble. Lower the oven heat to 350 degrees. Put a thin layer of tomato sauce at the bottom of the casserole, layer eggplant slices, more sauce, some grated pecorino romano cheese, sliced fresh mozzarella and basil. Continue with the layers until you use everything up.


As is the case for most dishes, the quality of your ingredients really matters here. It's simple to make but it won't be nearly as good if you use jarred sauce and shredded mozzarella from a plastic bag. I make my own sauce every couple of weeks and I usually have some available in the fridge or freezer. It is easier, cheaper and more delicious than buying the processed kind. I'll post the recipe next time I make it.

I bought a large 8 oz ball of fresh mozzarella but you could also get a tub of the mini mozzarella balls (bocconcini).

Once you're all assembled, cover the dish with tin foil and bake for about 30 minutes. Remove the tin foil for the last 10 minutes or so.

Let it rest for about 5 minutes before serving so it can set up a bit. I served it with pasta. It will also be great leftover... particularly on a nice roll with some extra cheese.

Enjoy!

Easy Panzanella Salad with Rosemary Garlic Flank Steak

I was trying to think of an interesting way to use the croutons that I made last weekend and I decided to make a panzanella style salad. Panzanella is a traditional Italian salad that uses stale bread that softens up again when mixed with fresh vegetables and a nice vinaigrette. It's super easy to throw together, especially if you have croutons already made. If not, you can easily toast up some cubed bread seasoned with salt and pepper and drizzled with some olive oil. 

Karl is still working a crazy schedule so I decided to pair the salad with flank steak since it grills up so quickly.I just prepped everything ahead of time and then was able to finish up dinner in 15 minutes.

Flank Steak - What you'll need:
1 flank steak (mine was about 1.2 lbs)
1 Tbsp rosemary (finely chopped - fresh, if possible)
1 Tbsp salt
1 Tbsp garlic powder
1 tsp red pepper flakes
zest of 1/2 lemon
black pepper (several turns of the pepper grinder)
drizzle of olive oil

Flank Steak - How to do it:

Remove the flank steak from its packaging and pat dry with paper towels. In a small bowl combine the rosemary, salt, garlic powder, red pepper, lemon zest and black pepper. Mix together and slowly drizzle in a bit of olive oil until the mixture is the texture of wet sand. Rub the mixture on the steak (really massage it in) and let sit for at least an hour. If you are going to let it sit for longer cover it with plastic wrap and put it in the fridge. Just be sure to take it out of the fridge 20-30 minutes before you're going to cook it. You never want to put cold meat onto a hot grill.It will make the meat seize up and it will be tough.


I used an indoor countertop grill to make my flank steak. An outdoor grill would be the ideal choice but if you don't have access to either you can use the broiler in your oven. Just be sure to put the cooking rack fairly close to the broiler and to leave the oven door open a crack.

If your steak has been sitting awhile you will want to gently pat it again with paper towels before cooking. Meat should always be dry before cooking. If there is too much moisture it won't sear when it hits the grill - it will steam and turn grey and you may throw a fit (like I've been known to do when this happens to me... just ask Karl).


Most flank steaks will take about 6-7 minutes per side for medium rare. Adjust the time to cook the meat to your liking... but I recommend that you don't cook flank steak beyond medium.

When you remove the steak from the grill or broiler DO NOT CUT IT RIGHT AWAY. Put it on a cutting board and let it rest for 10 minutes. This is a very important step and allows the juices to redistribute. If you cut it right away you'll notice that all the juice runs onto your cutting board and your meat is dry. To occupy your hungry self during this waiting period I recommend that you pour some wine and get the table ready.

Once the meat has rested, thinly slice it against the grain.


Panzanella Salad - What you'll need:
1 English cucumber (or one regular cucumber peeled)
1 bell pepper (whatever color you choose... but I recommend you stay away from green in order to add more color to your salad)
1/2 red onion
A heaping handful of grape tomatoes (use whatever you have that looks good)
1 handful fresh parsley
A few fresh basil leaves
4 Tbsp red wine vinegar
1 tsp dijon mustard
1 clove garlic (finely chopped)
1 tsp honey
1 tsp oregano
salt
pepper
red pepper flakes
1/4 cup extra virgin olive oil
2-3 cups of homemade croutons (or cubed bread that you have toasted in a hot oven)

Panzanella Salad - How to do it:

Chop the cucumber and peppers into good size chunks. You want the pieces to be large enough to compete with the croutons. Halve the tomatoes (or chop larger tomatoes into chunks). You don't want to leave the tomatoes whole even if they're small. The natural juices of the tomato mix really nicely with the vinaigrette. Thinly slice the onion.


Next, make the vinaigrette. I really like to use old mustard or jam jars to make salad dressings. Shaking dressings helps to emulsify them and you can easy pour and store the dressing this way. You can certainly make this in a bowl and use a whisk to combine but I swear this is easier.

Combine the vinegar, mustard, honey, garlic and oregano in the jar. Now add a few shakes of red pepper, a few grinds of black pepper and salt. I recommend starting with a 1/2 teaspoon. Close and shake. Taste the dressing.It won't taste perfect because you haven't added the oil yet but it should taste good. Add more salt if you think you need it. Now add the olive oil. Close and shake. Your dressing should be a nice golden color. Taste and do any last seasoning adjustments. You may even want to double the recipe so that you have some extra to use later in the week.


Now you're ready to compile the salad. In a large bowl combine your croutons and chopped veggies. Add a handful of chopped parsley and a few torn basil leaves. About 15-20 minutes before you're ready to eat, add the vinaigrette. Gently mix every few minutes to ensure that all of the bread soaks up some of the liquid.


A note on timing:
If you're planning on making these two dishes together this is the way to do it.
1. Make rub and season meat
2. Chop veggies and herbs for panzanella (toast bread if necessary)
3. Make dressing
4. Grill meat
5. Compose salad and add dressing while meat is grilling
6. Drink wine and set table while meat rests

Monday, November 5, 2012

Some Comfort: Pork Chili Verde


This has been a rough week. Between Hurricane Sandy and some other sad news, I felt the need for a warm bowl of comfort. We were very lucky to be left unscathed by the storm but an emergency means that Karl's work kicks into high gear -resulting in lots of late nights and odd meal times.

After several late-night cheeseburgers and fries I decided to make something healthy and rejuvenating... and something that could simmer on the stove until whatever time Karl was able to make it home for dinner.

Pork Chili Verde was just the answer. Slightly smoky and spicy, with a bit of tang from the tomatillos. Delicious. Feel free to substitute chicken if you don't eat pork (although, I couldn't imagine why) or remove the pork and substitute vegetable stock if you want to keep it vegetarian.

What you'll need:

1 pork tenderloin (mine was 18 oz)
1 Tbs olive oil
Salt & pepper1 onion
1 jalapeno
3 cloves garlic
2 cubanelle or poblano peppers
4 tomatillos
2 cans white beans (cannellini)
1 bay leaf
1 can green chiles (4 oz)
1 Tbs oregano
1 Tbs cumin
1 Tbs coriander
1 Tbs paprika
1 Tsp cayenne pepper
1 box chicken stock (1 Qt)
1 handful fresh cilantro + more for garnish
Sour cream (for garnish)


How to do it:

First, dry the pork well with paper towels and cut it into cubes (1 inch or so) - season liberally with salt and pepper. Then prep all of your vegetables. Dice the peppers, onion and jalapeno (leave the seeds in if you can handle some spice). Mince the garlic or use a microplane later to grate it directly into the pot. Remove the husks from the tomatillos and rinse them well under warm water to remove the sticky stuff. Dry and roughly chop them.

Heat the oil in a heavy pot and add the pork. Make sure the oil is hot enough. The pork should sizzle when it hits the pan. Lightly brown the pork on all sides and then remove it and set it aside on a plate.


Now lower the heat and add the onions. The onions will start to sweat and get soft but they shouldn't take on much color or get hard. Once they start to soften add the garlic, jalapeno and peppers. Season with a bit more salt and pepper and sautee for a few minutes until all vegetables have softened.


Add pork back to pot (+ any juices that accumulated) along with the beans (drain and rinse them first), bay leaf, tomatillos, green chiles, oregano, cumin, coriander, paprika, cayenne and another sprinkle of salt. Mix gently to incorporate them.


Now add the chicken stock. I had already used a little bit from this box for another dish earlier in the week, so I also added about 1/2 cup of water. If you do the same you may just need to add a bit more salt to account for the lack of seasoning.

Partially cover the pot and let the chili verde simmer for at least an hour... but the longer the better. Stir occasionally. Taste it after the pork has cooked all the way through (10 mins or so) and adjust the seasoning accordingly. Before serving add a generous palm full of chopped fresh cilantro.


Serve it over rice or with some fresh bread on the side. Top with cilantro and sour cream and enjoy!

I hope this recipe helps to bring a sense of calm and normalcy after this crazy week.

Saturday, November 3, 2012

Croutons Are Delicious

Am I right? I could eat those boxed croutons alone as a snack. But you know what's even better? Homemade croutons.

This week we accidentally let the better part of a delicious loaf of sourdough bread get stale. I can only attribute this to the crazy storm and the chaos that followed because Karl and I usually eat nearly the whole loaf the first night I bring this bread home from Whole Foods (with plenty of olive oil, of course).

I almost threw the poor bread away and then I thought - CROUTONS!

What you'll need:
Some good bread that you foolishly let get stale (I used 2/3 of a round sourdough boule. It ended up being about 3 cups cubed)
1/2 cup olive oil (extra virgin - don't mess around)
1 tablespoon butter
1 teaspoon garlic powder
Salt
Pepper (freshly ground)
Red pepper flakes
Rosemary (dried)
Fresh parsley (about a handful)
Pecorino Romano OR Parmigiano Reggiano cheese (2-3 Tbs, freshly grated)

How to do it:

First, preheat your oven to 400 degrees and cut the bread into cubes.


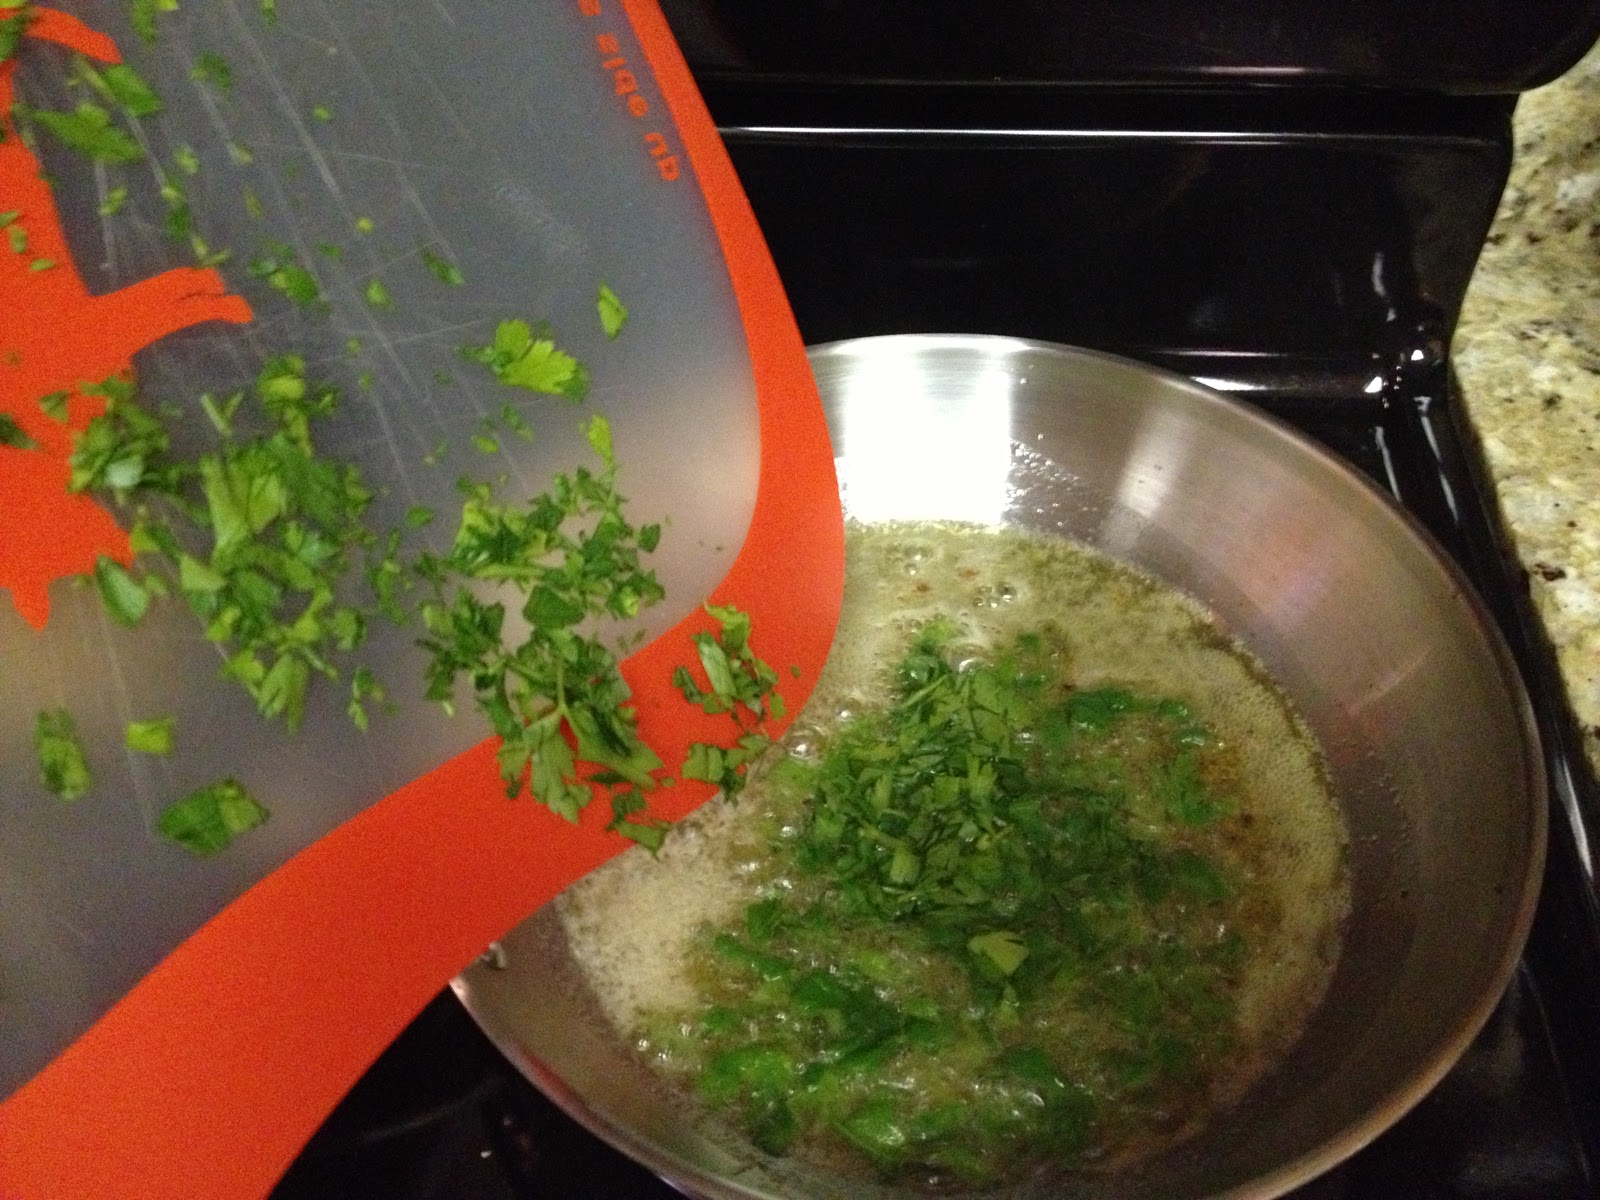
Then, add the olive oil and butter to a sautee pan over low heat. Add the garlic powder, a generous pinch of salt, several turns of the pepper grinder and two or so shakes each of the red pepper and rosemary. Once the butter has melted fully and the mixture is bubbling lightly (don't let it burn!) add a handful of chopped fresh parsley and then remove the pan from the heat. Carefully, taste your mixture. Does it need more salt? A dash more red pepper? If so, add it now.

Please disregard the fact that I'm using a cutting board intended for meat. It was clean :)
Add the bread to a mixing bowl and pour the delicious oil/herb/butter mixture over it. Gently mix so that all of the bread gets covered. Once the oil has been distributed fold in the freshly grated cheese.


This next step is crucial. Avoid the urge to eat this bread right now. It will be even better after you toast it! Spread the bread onto a sheet pan. Be sure to use a large enough pan (or 2 if necessary) so that each piece will have a chance to get golden and delicious. Pop it in the oven for about 20 minutes. You will need to keep a fairly close eye on this, as bread goes from perfectly toasted to absolutely ruined in a matter of seconds. Make sure you use a spatula to turn the bread a few times while it's cooking. Again, make sure all pieces and sides have a chance to toast up.

Once everything is toasty and delicious remove it from the oven and lightly sprinkle with a bit more salt. The croutons are now ready to be thrown into a salad or on top of a bowl of soup. They should also keep in the cabinet for a week or longer if you put them into an airtight container. However, I doubt they'll last that long. Mine may not even last long enough for me to make soup to pair with them!


Tuesday, October 30, 2012

Chicken & Veggie Curry


I didn't realize that I liked curries until about a year ago. Turns out, what I don't particularly like is coconut milk, which is in many curries. But curry on it's own? Delicious. My boyfriend and I started to frequent a great local Indian restaurant a bit too often so I started making this chicken curry with tons of veggies. It's healthier and cheaper, so you can have more wine with dinner.

If you do like coconut milk feel free to use it in place of half and half. Likewise, I don't love ginger but if you do add some fresh ginger when you add the garlic. Veggies can be swapped out as you like. Use what you like and, ideally, what's in season.

What you'll need:
1 package of boneless, skinless chicken breast
1 bell pepper (I used green, but any color will do)
1 medium white or yellow onion
2 cloves garlic
1 Tbs tomato paste
Chicken stock (I love to use the resealable stock in a box. You will only need about 1/2 of one.)
2-3 cups fresh spinach
Half and Half (1/4 to 1/2 cup)
1 Tbs butter
Curry powder
Turmeric
Cumin
Coriander (ground)
Cayenne Pepper (can substitute hot sauce or red pepper flakes)
Salt & Pepper
Generous handful of fresh cilantro, plus more for garnish
Scallions, chopped for garnish
Rice, for serving

First, cut the chicken breast into cubes - about an inch or so in size. Season the chicken with a generous tablespoon of curry powder, a teaspoon or so each of the turmeric and coriander, a few sprinkles of cayenne pepper and a good amount of salt and pepper. Rub it together. You can't be afraid to get your hands dirty if you want to make something delicious.


Then chop the pepper and onion into 1 inch pieces and thinly slice the garlic. Be sure to wash your hands and knife and use a new cutting board so you don't kill anyone.


Second, heat a large skillet (preferably one with high sides and avoid nonstick pans if you can) on medium or so heat. Coat the bottom of the pan with a thin layer of olive oil. Make sure your pan and oil are hot enough so you'll hear a sizzle when the chicken goes in, but not so hot that the oil is smoking. If you overheat your oil take it off the heat, wipe it out and start again. Once the pan is ready add the chicken, but don't crowd the pan! The point of this step is to get a nice brown on all sides of the chicken. If you're not using a nonstick pan, some of the chicken bits will stay in the pan and create a really nice flavor. Don't worry if your pan starts to look a little sticky and brown. Once the chicken is nicely browned on all sides take it out of the pan and set aside on a plate. The chicken should not be fully cooked yet. It will finish cooking later on in the sauce. Your kitchen will have started to smell amazing by now.


Third, turn the heat down a bit and add the onions. You want them to soften but not brown.You may need to add a bit more oil if the pan has gotten dry. Once the onions start to sweat add the garlic and pepper. After all the veggies are a bit soft (I like the pepper to stay pretty firm) add the tomato paste and increase the heat.


Be sure to mix it in the veggies very well. The mixture will feel sticky and may stick to your pan. That's alright. Once the tomato paste is really fragrant, begin to pour the chicken stock in. Add enough to barely cover the veggies and use a wooden spoon to scrape up all the good bits that are stuck to the pan. Then add in the chicken that you browned earlier (and any juices that have accumulated). Then add a bit more chicken stock, if necessary. You want the chicken to be covered by about 1/2 -3/4 (I used a bit too much in my photo below...).


Put a lid on the pan, but leave some space for steam to escape. Lower the heat to a simmer and let the chicken slowly finish cooking (5-10 minutes) before you start tasting and adjusting seasoning. Once the chicken is cooked, remove the lid and increase the heat slightly so that the sauce can reduce. Add another tablespoon of curry powder and more salt and pepper. Put a bit more seasoning than you think you need because you will add spinach and half and half later and this will dilute it a bit.

Next, add about 2 cups of chopped fresh spinach to the pot. It will seem like a ton at first but spinach cooks down so much. Use tongs to gently fold the spinach into the sauce.


Now add the butter and half and half (a few swirls around the pan). You want to add a slight creaminess to round out the spice, but not enough to make it heavy. Taste again and reseason if you need to. If it is too spicy add more chicken stock and/or half and half. Stir in a palm full of chopped fresh cilantro.


Serve with rice and top with freshly chopped cilantro and scallions. I added some roasted delicata squash on the side because we can never get enough vegetables.

Enjoy!