Sunday, April 7, 2013

Banh Mi - Style Chicken Burgers

Vietnam has been high on my list of must-visit countries for some time now. I can't wait for the chance to see the colonial architecture of Hanoi and Ho Chi Minh City, rice
paddies, the Mekong Delta and - of course - the FOOD. 

The banh mi was inspired by Vietnam's history of French colonialism. It combines classic French ingredients (baguette, pate, mayonnaise) with classic Vietnamese ingredients (cilantro, pickled vegetables and hot peppers). The banh mi sandwiches that you will find in the US are delicious but far from light. I played around with a few recipes and came up with this lightened up version using ground chicken, fat free Greek yogurt and a whole wheat bun. I served it with an easy red cabbage slaw and some steamed veggies for a great weeknight meal.

What you'll need: 
1 lb ground chicken
2 Tbs sliced scallions
1  large handful of fresh cilantro
1 Tbs soy sauce
2 cloves garlic
3 radishes (thinly sliced)
1/2 c shredded carrots
2 tsp rice wine vinegar
1/2 tsp sesame oil
1 English cucumber (thinly sliced)
Pickled jalapenos (for garnish)
1 Tbs mayonnaise (heaping)
1/2 c fat free Greek yogurt
1 1/2 tsp sriracha (Asian hot sauce)
1/4 tsp garlic powder
olive oil 
2 Tbs chicken stock
3-4 whole wheat rolls (depends on the size burger you want)
salt
black pepper

How to do it:

First, prep the pickled veggies that will be one of your burger toppings. This is one of my favorite parts of the burgers. I love putting cold crisp veggies on hot dishes. Combine the sliced radishes, shredded carrots, rice wine vinegar and sesame oil in a small bowl. Add 1 Tbs chopped fresh cilantro and a pinch of salt. If you like spice you can also add about 1/2 tsp of the pickling liquid from the jar of jalapenos. Mix well and chill until your burgers are ready.


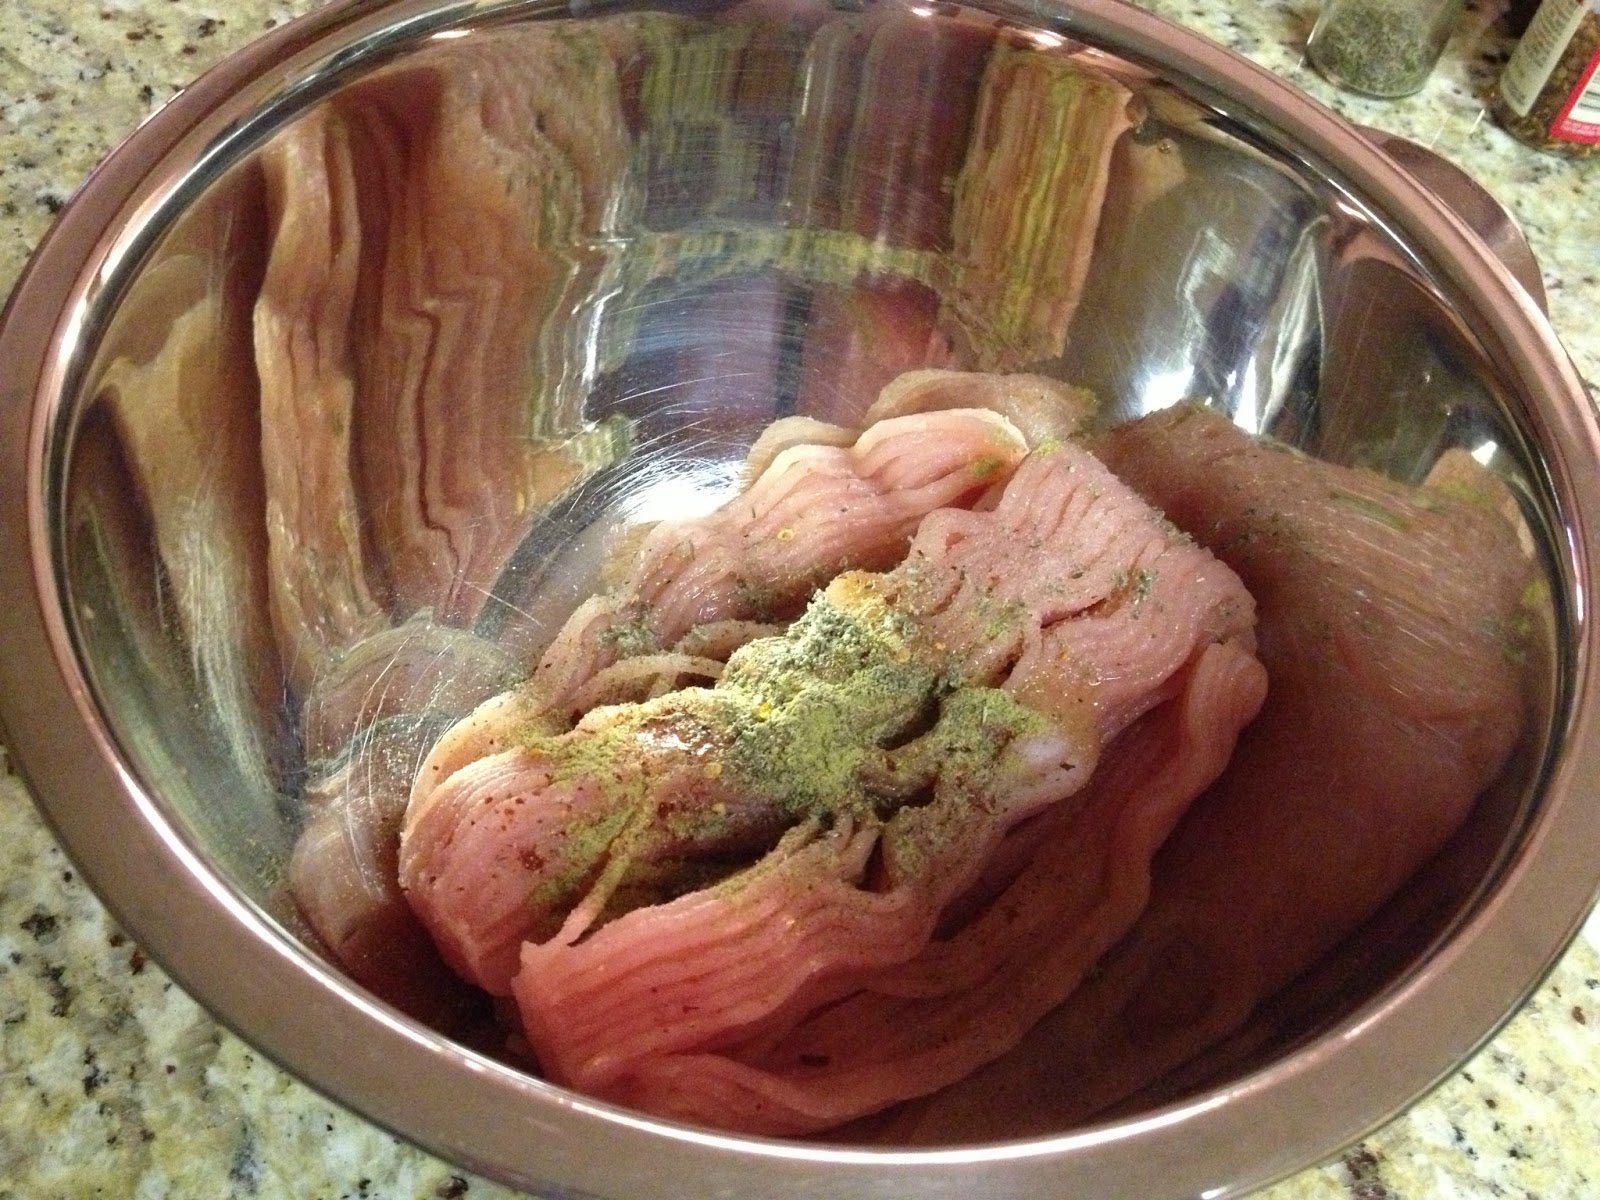
Next, combine your meat and spices. Put the ground chicken in a large mixing bowl. Add the scallions, soy sauce, 2 cloves finely minced garlic and 2 Tbs chopped cilantro. Combine all of the ingredients without over mixing and then form into 3-4 patties. Ground chicken can be really sticky. I find that it helps to form the patties with damp hands.


Let the burgers sit out and warm up a bit before you cook them. Now is a good time to make your sriracha yogurt sauce. Combine the mayonnaise, Greek yogurt and garlic powder in small bowl. Add the sriracha (or other hot sauce) to taste. I used 1 1/2 tsp. You may want to start with 1 tsp and then add more if you like. Add a generous pinch of salt and some freshly cracked black pepper. Mix well and pop into the fridge.


Now you are ready to cook the burgers. If you're like me you've been tasting the pickled veggies and that delicious sauce and now you're STARVING. Don't worry, these burgers cook quickly.

Heat a large frying pan over medium heat and lightly coat with olive oil. Your pan and oil should be hot when you hold your hand over but not so hot that its smoking. You should hear a nice, satisfying sizzle when you put the burgers into the pan. If you don't quickly fish it out and wait until your pan is hot enough.


Cook the burgers on 3 minutes per side. Then add about 2 Tbs of chicken stock to pan. Cover the pan and reduce the heat to somewhere between low and medium. Cook for another 3 minutes and then remove the cover to let the moisture evaporate for about 1 minute. Adding the chicken stock really helps keep turkey and chicken burgers moist. They can dry out easily since you have to be careful to cook them all the way through. I use this last minute to lightly toast the buns. 


So all of your components are ready and your kitchen smells awesome. Now it's time to artfully craft your burger. Slather the top and bottom of your bun with the sriracha sauce. Put a few slices of cucumber on the bottom and then top with the patty. Pile the pickled veggies on top along with a few jalapenos and a few tablespoons of fresh cilantro (whole leaves) - really pile it on there as a substitute for lettuce. 

This burger is as satisfying as your classic cheeseburger but it is full of new and exciting flavors. I hope you enjoy as much as we did!


Sunday, January 20, 2013

Roasted Chicken & Honey Mustard Potatoes

Have you ever heard of engagement chicken? It's a recipe for roasted chicken that is supposed to be so amazing that your boyfriend will be moved to propose to you after eating it because it is the type of meal a wife would make. This is not that chicken recipe.

While I do think the concept of engagement chicken is a pretty ridiculous I totally agree that a roasted chicken is a beautiful thing. Roasting a chicken is actually incredibly easy yet the finished product seems impressive. I highly recommend it for company or a special occasion. It allows you to do a little work up front and then you're free to entertain your guests, drink wine, fold laundry.... whatever it is you rather be doing instead of sweating over a complicated recipe that you may just mess up at the last minute anyway.


I paired this lemony roasted chicken with roasted potatoes in a honey mustard glaze. If the oven is going to be on you may as well use it to make your side dish. Again, the work for the potatoes is done mostly ahead of time.

One note: I find that chickens (especially organic) really don't feed more than 2-3 people. If you are planning on serving a larger group make an extra chicken or two and adjust the other ingredients accordingly.

LEMONY ROASTED CHICKEN

What you'll need:
1 whole chicken (I recommend organic whenever possible. I think mine was about 4-5 lbs)
4 cloves garlic
1 lemon
2 Tbs honey
1 Tbs rosemary
1 Tbs Dijon mustard
1/4 c olive oil
salt
pepper
paprika
red pepper flakes

How to do it:
First you'll want to take the chicken out of the fridge about an hour before you want to start cooking. You don't want to put a cold chicken (or any type of meat) directly in the oven. Also, preheat the oven to 400 degrees.

While you wait for the chicken to come to room temperature and the oven to heat prepare the rub for the chicken.  First chop the garlic gloves and zest the lemon. Be careful to only remove the yellow parts and not the white pith, which is very bitter. Combine about 3/4 of the garlic and all of the lemon zest in a bowl. Add the honey, rosemary, mustard and the juice of half the lemon. Add a generous pinch of salt (about 1/2 tsp), a good amount of black pepper and some red pepper. Combine with a fork or whisk and then slowly stream in about 1/4 cup of olive oil. Set aside.


After the chicken is at room temperature remove the neck and giblets from the cavity, put it in a roasting pan (preferably one with a rack that will elevate the chicken) and pat the chicken dry with paper towels. Sprinkle generously with salt, pepper and paprika. Be sure you add a bit of salt inside the cavity too.


Put the two lemon halves (one has been squeezed, one hasn't) and the remaining garlic in the cavity. Now spread the rub you prepared all over the chicken. Make sure you lift the skin a bit and get some right on the breasts. Dont' neglect the thighs and legs and be add a little to the cavity as well.


At this point I sprinkled a bit more olive oil, salt, pepper and paprika on top for good measure. I also recommend that you tuck the wing tips under the bird before you put the chicken in the oven. You can see from the photo of my finished product below that I forgot this step and my wing tips burned.

If you do have a roasting rack I recommend putting an inch or so of water in the bottom of the pan. This will help to keep the chicken moist and will stop the drippings from burning and sticking to your pan. Skip this step if you don't have a roasting rack. In that case you may want to put the chicken on a bed of an onion and/or some celery and carrots. It helps to prop up the chicken a bit and makes a pan sauce.

Put the chicken in the oven and cook at 400 degrees for 15 minutes. After 15 minutes reduce the temperature to 350 degrees and cook for 45-60 more minutes. I think I cooked mine for about 50 more minutes after the initial 15. This will depend on your oven and the size of the chicken. I recommend using a meat thermometer in the thickest part of the breast about 45 minutes in. You want the temperature to be about 165. The temperature will continue to rise while it rests.

Once the chicken is ready remove it from the oven and cover with tin foil. Allow to rest for about 10 minutes before carving.


Carve and enjoy!


HONEY MUSTARD POTATOES

What you'll need:

1 lb waxy potatoes (I used an awesome mixed color medley from Trader Joe's. Avoid russets; which is what you would usually use for a baked potato)
2 Tbs Dijon mustard
2 Tbs honey
3 Tbs olive oil, divided
salt
pepper
red pepper flakes
1 handful fresh parsley, chopped

How to do it:
Preheat the oven to 375 degrees. Wash and dry the potatoes and then cut them into chunks - about an inch or so in size. Add them to a roasting pan. I sometimes use cookie sheets for roasted potatoes but you'll want a pan with somewhat higher sides for this dish.


Dress the potatoes with about 2 tablespoons of olive oil, a generous amount of salt (about 1/2 tsp) and black pepper. Combine well so all potatoes are coated. Roast the potatoes for about 30 minutes. Turn them over one or twice so that the potatoes brown evenly.

While the potatoes cook prepare the glaze. Combine the mustard, honey and olive oil in a bowl. Add a good pinch of salt, black pepper and a bit of red pepper flakes. Stir to combine.

Once the potatoes are browned and nearly done, remove the pan from the oven and mix in the glaze - coating the potatoes evenly. Return to the oven and cook for another ten minutes or so.

Karl noted that these would also taste great with some bacon fat so if you happen to have any leftover from breakfast feel free to add that to the glaze.

 After 10 minutes remove them from the oven and taste. Add another sprinkling of salt if you need and add the fresh parsley. Delicious!


Some tips for making these dishes together:
  1. Prep the chicken
  2. Make the rub
  3. Prep the potatos
  4. Make the glaze
  5. Add pototoes to oven when chicken has about 30 more minutes to go
  6. Add glaze to potatoes when you remove chicken and rest it
  7. Potatoes will be done when chicken is fully rested


Saturday, January 5, 2013

New Year, New You: Turkey Breakfast Sausage


Happy New Year (a bit late)! OK, so I'm also really tardy with this post. Holidays, travel, broken computer - blah, blah, blah. I'm back now.

Like most people I resolved to be healthier this year. Luckily, experience has taught me that you don't have to sacrifice everything you love in order to eat in a more healthy way. That is one of the things I love most about cooking. When you prepare your own meals you control what goes into it and, more importantly, what doesn't.

Karl and I looove to have breakfast sandwiches on Saturday mornings. You really can't beat a bacon, egg and cheese on an English muffin. And I honestly think the sandwiches I make at home are better than what you would get at a diner. Plus, we don't need to put on real pants. I also love a good sausage patty with my eggs but even turkey sausage often has a lot of added fat and fillers. It's pretty scary if you read the ingredients on the average box of breakfast sausage. Ick.

I decided to try to make my own breakfast sausage using extra lean ground turkey. This is a lighter substitute for bacon (and wayyyyy better for you than prepared sausage) and the patties were really easy to make. This recipe makes about 10-12, depending on how large you make them. You could even freeze them and then microwave one to make a quick weekday breakfast later on.

What you'll need:


1 lb extra lean turkey sausage
1/2 tsp salt
1/4 tsp onion powder
1/4 tsp thyme
1 tsp ground fennel seed
1/2 tsp ground sage
generous pinch red pepper flakes (1/8 to 1/4 tsp depending on how spicy you like it)
2 Tbs maple syrup (use the real stuff)
freshly ground black pepper
drizzle of olive or canola oil for cooking the patties

How to do it:
Put the ground turkey into a large mixing bowl. Add the salt through maple syrup. Crack a good amount of black pepper on top.


Mix up the meat and spices with your (clean) hands. Lean ground turkey is pretty sticky and annoying to work with. If you start with wet hands it will be a bit easier. Thoroughly combine without over mixing.

Next heat a non stick skillet and add a bit of oil. Once the skillet is hot scoop the turkey mixture in. I used a 1/4 c measuring cup but next time I think I would use a 1/3 c. At first you will keep the sausage in these little round balls but don't worry - they'll be patties soon.

After the sausage browns on one side flip it and then use your spatula to push it in patty. It is very important that you push down on the side that's already browned. If not the mushy turkey will get stuck in your spatula and will basically ruin your life. Trust me. I am speaking from experience.


See? Push on the browned side. Cook a few minutes per side until each side is browned like this.


Then drizzle about one tablespoon of water into the pan and cover for a minute or so until the water evaporates. This helps to deglaze the pan and the steam ensures that the turkey is cooked all way.


I like tons of flavor in my sausage so I sprinkled it with a bit more salt, pepper and red pepper once it was cooked. You can do the same or you can cook a small test patty and then adjust your seasonings as necessary.

The patties are great on a breakfast sandwich (see above) or crumbled into an omelet, served next to scrambled eggs, with french toast. You name it.

They reheat easily in the microwave (30-60 seconds). You can also put them in a single layer on a plate in the freezer. Once they freeze throw them into a freezer baggie. This makes it easy to grab one at a time later on.

Enjoy!

Saturday, December 1, 2012

Lamb Kofta and Kale Salad with Lemon-Tahini Dressing


Middle Eastern food is awesome. Regrettably it's something that I wasn't introduced to until relatively recently - but it quickly became one of my favorite cuisines. The flavors are quite close to the Mediterranean flavors in Italian dishes (another favorite) but the introduction of new spices and combinations will wake up your taste buds.

Now, a disclaimer. I haven't traveled to the Middle East (yet!). So I do not claim any level of authenticity here. Nor can I adequately distinguish between the cuisines of different countries within the region. What I can say is that these dishes taste really good and are easy to make. Karl lived in Iraq for two years so I make this lamb kofta to give him a taste of one of his favorite Iraqi dishes so he doesn't get the crazy idea to run off and live there again.

I have also made the kofta with ground beef and it worked out well. This is not a dish where I would recommend substituting ground chicken or turkey. Leaving a little pink to the meat helps to keep the kofta moist and that wouldn't be safe when using chicken or turkey.

The kale salad is delicious and could be made as a side dish for the kofta or on it's own. The dressing for the salad is vegan and uses sesame paste (tahini). Tahini is a great ingredient but you may not have it on hand. In that case, you can substitute peanut butter and add a bit more sesame oil.

 
LAMB KOFTA

What you'll need:
1 lb ground lamb
1 clove garlic (minced)
1 tsp rosemary
1 tsp cumin
1/2 tsp turmeric
pinch cinnamon
2-3 shakes of red pepper flakes
1/2 tsp salt
freshly ground black pepper
handful fresh cilantro (chopped)
olive oil (drizzle)
chicken stock (splash)
fresh basil leaves (for serving)

How to do it:
Combine lamb through cilantro in a large mixing bowl.


Combine well with your (clean!) hands and then portion into patties. Kofta is often served kebab-style on a skewer. I skip this when I make it inside but I would recommend using the skewers if you are using an outdoor grill. Either way, make your patties more oval/oblong to mimic the traditional shape. I make them rather small - getting 8 patties out of this mixture.


Heat a saute pan and drizzle with olive oil. Make sure the pan is hot enough to sear the meat but not so hot that the oil is smoking. Add the kofta to the pan (careful not to crowd them) and then DO NOT TOUCH THEM. Let them do their thing for a minute or two. Once the meat has properly caramelized you will be able to turn the patties with little to no resistance. If they seem difficult to turn then they are not ready yet.


Once you have turned all of the patties lower the heat, add a splash of stock to the pan and put a lid on it. Let the patties continue to cook and steam for about 5 minutes. This should leave the kofta juicy with a bit of pink in the middle. Serve with kale salad, rice or pita and hummus. The kofta in Iraq was always served with fresh basil leaves so we add that as well.


KALE SALAD

What you'll need:
1 large bunch of kale (washed and chopped)
1/2 shallot (minced)
1 clove garlic (minced)
1 Tbs tahini paste
juice of 1 lemon
2 Tbs rice vinegar
1/4 tsp salt
freshly ground black pepper
dash of cayenne pepper
1 tsp sesame oil
1/4 cup oil oil
1/4 cup pumpkin or sunflower seeds (toasted)

How to do it:
This salad is so easy, it's practically ridiculous. It's also really good for you.

I bought pre-washed and chopped kale from Whole Foods. I used half of this (below) and estimate that would be about equal to one large bunch of kale. If you buy the bunch, wash, dry and chop it. I think this salad is best when the kale is chopped pretty fine, so I gave this kale an extra chop.


Combine the minced shallot, garlic, tahini, lemon juice and vinegar in a small bowl. Use a whisk to combine well. Add salt, pepper and cayenne and taste it. Add more salt if necessary. Add the sesame oil and then slowly stream in the olive oil. You can skip the measuring and slowing stream in oil until the dressing has doubled in volume. That will usually do it. Taste the dressing and adjust seasonings as necessary.This recipe makes enough dressing for about two bunches of kale.


If you are toasting your own seeds, add them to a dry pan and toast over a warm burner for just a few minutes. Keep a careful eye on them - they burn quickly. As soon as they're done remove the pan from the heat and salt the seeds.


Combine the kale, dressing (about 1/2 of this recipe for 1 bunch of kale) and seeds in a large bowl. Mix well and let it sit for 10 minutes or so before serving so the dressing has a chance to wilt the kale a bit.


This salad makes a hearty side dish and a great lunch. Enjoy!


Wednesday, November 28, 2012

Meatless Wednesday? Chickpea Stew

I would like to preface this post with a fact: I love meat. But the thing is, it has become more and more apparent that Americans eat too much of it. It's taking a toll on our health and our environment and I'd be hard pressed to find someone who couldn't benefit from eating more vegetables and whole grains and fewer animal products.

Mark Bittman and Michael Pollan both have great philosophies on this subject. Neither villianize those of us who enjoy a good steak or some delicious bacon but they do promote eating the best quality meat in smaller quantities and less frequently. Bittman even goes as far as eating vegan before 6 pm but then he has whatever he wants for dinner. This is the way he has chosen to keep the majority of his diet plant-based. You needn't go this far if you don't want to. A great way to start is to practice Meatless Monday or Wednesday, or Sunday. Whatever day of the week that works for you.

Karl and I re watched Food,Inc this weekend. It was just the energizer we needed. Since moving into together we have gotten into the habit of larger, more luxurious meals that contain more meat than either of us ate before we lived together. We're committing to being more conscious about the food we buy and consume. I hope you will too. I promise you will be making the right choice for your health, your wallet and your world. You will also be seeing more meatless options featured on my blog - so hopefully your taste buds will benefit as well.

Here is an easy chickpea stew recipe to get you started. If you use vegetable stock this recipe if vegan. Either way it's delicious.

Fun fact: One cup of chickpeas contains more than 25% of your recommended daily allowance of protein and more than 40% than the recommended daily allowance of fiber.

What you'll need:
1 small yellow onion (diced)
I celery stalk + the leaves if you have them (diced)
1 large carrot (peeled and diced)
3 cloves garlic (minced)
olive oil (a few drizzles)
1/2 Tbs rosemary
1 bay leaf
zest of 1 lemon
3 cans chickpeas (drained and rinsed)
generous pinch of red pepper flakes
1/2 tsp turmeric
chicken or vegetable stock (1 box = 32 oz)
1 tsp salt (+ a few more sprinkles)
black pepper
water (~ 1/2 cup if necessary)

How to do it:
Dice the onion, celery and carrot. Mince the garlic.


Heat a heavy bottomed pan over medium heat. Coat the pan with a generous drizzle of olive oil and add onions. Lower the heat and sweat the onions. You want them to soften but not take on color. Once they start to soften, add the garlic. Cook for 1 minute or so and then add the celery and carrots. Sprinkle lightly with salt. Add the rosemary, bay leaf, red pepper and lemon zest. Cook for a minute or two until fragrant.


This is me adding the lemon zest. The zest of one lemon will usually be about 1/2 -1 Tbs worth. Use a microplane or other hand grater and be careful to only take of the yellow, not the white stuff (pith), which is really bitter.

Drain the chickpeas and rinse them well. I like organic canned chickpeas because they have less of that stuff coating them (ie. sodium). You could certainly use fresh chickpeas but you will need to soak them for at least 8 hours before you prepare the stew.


Add the chickpeas to the pot. Cover with a box of stock - your choice. I used chicken stock because I always have it on hand but you could easily substitute vegetable stock to make this dish vegan. Add the turmeric, salt and several turns from the pepper grinder.


Bring the stew to a boil and then reduce it to a simmer. Simmer on low heat for about an hour. If the stew gets too thick add a little bit of water. I ended up adding 1/3-1/2 cup of water. Now be sure to taste the stew. Make sure the chickpeas are tender. Make sure there is enough salt. I find that people tend to be shy about adding salt. If you are preparing your own fresh meals it is very unlikely that you will overdo it with the salt. Packaged foods tend to be the major sodium bombs. Fresh food does require some salt to bring out the flavors. A teaspoon or two won't kill you.

Now, the next part can be done in a few different ways. You want to add some body to the stew without adding extra fat, so you will puree or mash half of the stew- leaving the rest of the chickpeas whole. I have a fantastic immersion blender, which makes this easy. I just put about half of the chickpeas in a bowl and pureed what was left in the pot. You could do the opposite and put half in the blender to puree. In a pinch you could even use a potato masher to break up some of the chickpeas, which will thicken the stew.


Which ever approach you take, combine the pureed/mashed chickpeas and the whole chickpeas back in the pot. Add a generous drizzle of good olive oil. Serve with some fresh bread and enjoy!

Psst... It's even better leftover.


Friday, November 23, 2012

Pumpkin Chipotle Chili


I love the fall. I love the weather, the leaves, sweaters and pumpkin flavored delights. I'd seen recipes for pumpkin chili in the past but I've never tried them - until now. This easy slow cooker chili combines familiar Thanksgiving flavors with smoky chipotle. Delicious.

If you're all turkeyed out, feel free to use ground beef. If you're a vegetarian or vegan leave the meat out all together, use 3 cans of beans and substitute vegetable stock. I used a slow cooker to make the chili. It was so easy to throw the ingredients in in the morning and then come home to chili all ready to eat. That said, you could easily make this on a stove top too. See stove top tips below.

Also, I HIGHLY recommend that you serve this over roasted butternut squash instead of rice. Roasted sweet potato would also work well.

What you'll need:
1 package ground turkey (~1 lb)
2 bell peppers (yellow or orange) - diced
1 medium onion (yellow or red) - diced
2 cloves garlic - minced
olive oil (drizzle)
1 can pumpkin puree - NOT pumpkin pie filling (15 oz)
1 can fire roasted tomatoes (15 oz)
1 can black beans (15 oz) - drained and rinsed
1 Tbs paprika
1 Tbs + 1 tsp cumin
1 Tbs oregano
1 Tbs chipotle chili powder (I used 1 1/2 but it was pretty hot. I recommend starting with 1 Tbs and adding more later if you like)
1 Tbs brown sugar
1 tsp cinnamon
1/2 tsp nutmeg
1 bay leaf
2 tsp salt
black pepper
chicken stock (about 1/2 of 1 qt box - more if you are doing this on the stove top)
1 handful chopped fresh cilantro + more for garnish

How to do it:
This recipe is so great because it only requires a little chopping and browning.Then you get to sit back and wait for your delicious and healthy meal. First, dice the onion and peppers and mince the garlic.

I had 1/2 yellow onion and 1/2 red onion leftover in the fridge, so I used a combo.

Next, lightly coat a hot pan with olive oil and brown the ground turkey. Once it has firmed up a bit add it to your slow cooker.


Now you want to add your onions and garlic to the pan and saute them quickly. You don't want to get any color on them or cook them very much. This is just to take some of the bite out of these ingredients, which can be pungent. Add the onions, garlic and raw diced peppers to the slow cooker.


OK, now it's time for everything else to go in. Add the pumpkin, tomatoes, beans, paprika, cumin, oregano, chipotle, brown sugar, cinnamon, nutmeg, bay leaf, salt and a few turns of black pepper. Stir it well.

Pour in enough chicken stock to cover. Keep in mind that the slow cooker traps in moisture so the chili liquid wont really reduce the way it would on the stove top.


Cover and cook on low. Since I was going to be at work all day set my slow cooker's timer for 8 hours and then it switches to warm. I recommend that you let the slow cooker do it's thing for at least 4-5 hours.

When you're almost ready to eat, remove the cover and let it cook on low a bit. This will allow some of the liquid to evaporate and the chili will thicken up a bit. Taste the chili and see if it needs a bit more chili powder, cinnamon, nutmeg, etc. If it did get too dry for your liking add more chicken stock.

Right before you're ready to eat add the cilantro. Serve over roasted butternut squash and offer a selection of garnishes, such as cilantro, chopped raw red onion, shredded cheese and tortilla chips. As you can see, I opted for all of the above. Enjoy!


Tips for stove top prep:
If you don't have a slow cooker or want to make this in a shorter amount of time, here's how:
1. Brown turkey.
2. Add onions and garlic, saute until they start to soften.
3. Add peppers and cook for 1 minute or so.
4. Reduce heat and add pumpkin through black pepper. Stir well.
5. Add chicken stock. The liquid will reduce during the cooking time so make it a bit soupier than you want your final result to be.
6. Simmer for an hour... but longer is always better. If you cook it for more than an hour cover it partially with a lid.
7. Add cilantro.
8. Eat and enjoy!

Sunday, November 18, 2012

Meatballs and Sunday Sauce

I often say that I grew up in an Italian American family and this is partly true. The reality is that the ratio is only 25% Italian but that 25% has always played a larger role than the 25% Swedish and 50% Polish that make up the balance. This probably has a lot to do with the part of Connecticut where I grew up - as it seemed everyone was at least a little bit Italian either by blood or marriage. Personally, I think it also has a lot to do with the food.

If you grew up in a family or an area like I did, you knew exactly what I meant when I said Sunday sauce (though your family may call it gravy). I would also bet that just reading those words brought back the smell of your grandmother's kitchen, the image of heaping plates of pasta, slowly cooked meats and perhaps some antipasti. I picture my Mama's kitchen, green carpet and all (yes, carpet in a kitchen). When I was young we would go to my grandparents' house on Sundays. We would eat at around two or three in the afternoon but everyone showed up early. My grandmother's Uncle Doc would bring fresh hard rolls topped with sesame seeds, which we would eat with soft butter for breakfast. The ladies would hunker down in the kitchen, looking at the circular for the sales of the coming week and my uncles would watch football with my grandfather in the living room. We weren't there as company - just a family spending a relaxing Sunday together.

Around noon Mama would give me a piece of Italian bread (I prefer the coolie, as I called the end) smothered in some of the rich sauce that had been bubbling on the stove since early morning so I could help her "test" it. Once we sat down for the main meal I would be flooded with flavors that were both new and exciting at the same time.

Italian food in America is often criticized. People point out that Italian American food is different than what you might find in Italy and that it has become too main stream. Many consider it unrefined or simple. Last year I read a great article that explored the evolution of Italian food in America. It made me have an even greater appreciation of a cuisine that was already so special to me. As with all cultures, Italian American food - particularly the iconic vision of a pot of tomato sauce and meatballs simmering on a stove top - is a vessel for sharing what is best and most precious.

Sadly, my family stopped this tradition quite a few years ago. People moved away and families got busier. It's not quite the same but every few weeks I try to do a Sunday dinner of my own. Karl and I may run a few quick errands but most of the day is spent at home, quietly enjoying each other's company and the comfort of our apartment. Allow yourself to step back for a Sunday (a Saturday will do) and spend the day at home, cooking for whoever is most precious to you. Salute!

SUNDAY SAUCE

What you'll need:
1 lb Sweet Italian sausage links
1 lb beef short ribs
*This is how I made it.I usually like a combo of pork and beef but at least one will do. Some other options are beef braciole, beef or veal shank, bone-in pork chops, pork neck bones. I do love hot Italian sausage but I think it affects the taste of the sauce too much. If you really want to use it do a 50/50 split of hot and sweet links. If you don't eat pork or beef use chicken thighs and legs with the bone.
1/4 cup (or so) extra virgin olive oil
1/2 yellow onion (diced)
3 cloves garlic (finely diced)
2 cans tomato puree (28 oz each)
** Ideally, these will be San Marzano. They are markedly better and sweeter than other varieties of tomato. It MUST be puree. To me, the delicious buttery quality of this sauce is inextricably linked to it's smooth texture. There is a time and place for chunkier, rustic tomato sauce. This is not it.
1/2 tsp red pepper flakes
1 Tbs oregano (slightly less if you use fresh, which I did)
1 handful fresh basil leaves
1 Tbs tomato paste
1/4 of red wine (drinkable)
3 tsp salt (+ a few more sprinkles)
1 tsp sugar
freshly cracked black pepper
1 Tbs butter

How to do it:
Heat a heavy bottomed pan and lightly coat it with olive oil. The pan needs to be hot enough to sear the meat but not so hot that the oil is smoking. Add the sausage links and brown on both sides. Remove, and set aside on a plate. Season the short ribs with salt and pepper and add to the pan. Do not crowd them. Brown them on all sides and then remove and add to the plate with the sausages. 


Turn the heat down to low and add a bit more olive oil. Add the diced onion and sprinkle with a bit of salt.You want to sweat the onions, which means they will become fragrant and give off moisture but they won't brown. This helps to keep them soft and ensures that they will melt into the sauce later on. Once the onions start to soften add the garlic. Like the onions, you want the garlic to soften but not to brown.

Once the garlic is soft add the red pepper, oregano and a few torn basil leaves. Saute for a few minutes until fragrant. Next, add the tomato paste and turn the heat up a bit. You want to cook the tomato paste for a few minutes to wake it up (as Rachael Ray says).The tomato paste will be sticky and may even brown on the pan again. Now add the red wine to deglaze the pan. You don't need much - a hearty splash will do. I won't lie and say that this splash doesn't come directly from my own glass sometimes. Well, if I make this sauce later in the day. Scrape up any dark bits from the bottom of the pan and let the alcohol cook off for a minute or two.


Now it's time to add the tomato puree. Reduce the heat to low and add both cans of tomato to the pan. Then gently add a bit of water to each can in order to get all of the tomato out. You want to fill each can 1/2 - 2/3 of the way full with water. Add the water to the pot. Add the salt and sugar. Add the browned meats back to the pan and leave the pot uncovered to simmer for at least 3 hours, ideally the better part of a day. If you are letting this bubble away all day loosely cover it after a few hours so that it doesn't over reduce and become too thick. This sauce isn't meant to be super thick.

When you're almost ready to eat add the butter and a few more torn basil leaves. Cook your favorite pasta to al dente and enjoy!


MEATBALLS

What you'll need:
1 cup panko bread crumbs
1/2 cup milk
1 lb lean ground turkey
1 lb lean ground beef
*You can use any combination of meat that you like. For holidays and other special occasions I would usually use a mix of ground beef, pork and veal - often sold together as 'Meatloaf Mix'. For normal days I use the lean meats so that I can have more of it more often :)
1 handful chopped fresh parsley
1 Tbs oregano
1 egg
2 cloves garlic (finely chopped)
1/2 tsp salt
2 Tbs grated pecorino romano or parmigiano reggiano
red pepper flakes (a few shakes)
freshly ground black pepper
All purpose flour (few tablespoons)

How to do it:
Add the panko to a large mixing bowl and cover with the milk. Let the milk soften the bread crumbs a bit and then add the remaining ingredients through the pepper.


Use your hands to mix the ingredients together. You don't to over mix it because this will make the meat tough but you do want things fairly evenly distributed. This is particularly important if you are using more than one type of meat.


Next, prepare a meatball rolling station. You will need a small bowl of water and a sheet pan. Roll the meatballs into whatever size you like. I find that a golf ball size or slightly larger works well. Wetting your fingers with the water in between rolls will help to reduce sticking.


Once all of your meatballs are assembled sprinkle a bit of flour over them and roll the balls around to lightly cover them on each side. The flour will help to create a sealant and will make it easier to brown them.


I find the next step to be really important: browning. Some people pop the meatballs right into the oven. I know that a lot of people even throw raw meatballs RIGHT INTO THE SAUCE. Shudder.I don't like the sound of that. I think that browning the meatballs adds a necessary crispness and depth of flavor.It also helps to protect the inside of the meatball and keep it moist.

Lightly coat a hot (not scalding) saute pan with oil and brown the meatballs in batches, careful not to crowd them. Your goal is not to cook them fully. You just want to firm them up. If you are using all beef or the meatloaf mix your meatballs can probably go directly from the pan into the sauce pot. I find the ground turkey to be particularly soft so I like to pop them into a 350 degree oven for 20-30 minutes before putting them into the sauce. If not they tend to fall apart.


Once the meatballs come out of the oven you can add them to your sauce. I usually like to let them simmer very gently for about 30 minutes before we're ready to eat. If you make the meatballs early in the day hold off on adding them to the sauce until 30-60 minutes before dinner.


Serve over pasta or with some fresh bread!